Managing Data in Wisr
Managing Data in Wisr
In this article, we will explain the ways in which data is imported into Wisr, with context for inviting and managing your members, deactivating members as well as updating existing member information within Wisr. This article provides specific instructions on file formatting and directly importing this data using the Data Tools section of the admin panel. If you are looking for more information on automating imports into Wisr over SFTP, please refer to this article.
Quick Video
This video demonstrates the functionality of the Data Tools in Wisr.
Pre-verification
Pre-verification is the process of importing members who will be invited to access your site and synchronizing any external data with their Wisr record. If you are unfamiliar with how Wisr structures member tables, this article provides more context on the purpose of pre-verifications: Managing Members.
Download your site-specific import templates
Admins can create pre-verified records individually or in bulk. Wisr will generate site-specific import templates for:
- Profile Data
- Degree Data
To download these templates, click either:
- Members > view the Pre-Verified tab > click the dropdown next to ‘Add one’ > click Pre-verify new members
- Data Tools > click the dropdown next to ‘New Job’ > Pre-verify new members
You will be taken to within the Pre-verify new members data job where you will see ‘Download a sample .csv file’ towards the bottom of the page. Clicking this download link will provide you a template with all current custom and profile fields.

We advise creating custom fields before importing records in bulk. Column headers will be added to your template for each custom field you create, allowing you to append fields and directory data to a member profile. For more information on custom fields, click here. If custom fields are added at a later point in time, following the directions for the Update Members data job below will allow you to easily append additional information to an existing record.
File Formatting
Files must be submitted as a CSV in the UTF-8 format. Please choose comma as your delimeter of choice when submitting these files as we do not accept tab, space or other ways of delimiting. If text qualifiers are supported when exporting from your CRM or Text Editor, please enable this feature as it can potentially pre-emptively solve a litany of import issues such as a comma being in the first name field.
Completing the Import Template
Whether you are putting together the CSV file manually in Excel or scheduling a Query Export from your CRM of choice, please keep in mind the following format and character limits.
Field
|
Type
|
Limits
|
Required
|
Notes
|
First Name |
Text String |
30 characters |
No |
We recommend using your member’s preferred name |
Last Name |
Text String |
50 characters |
No |
|
Email Address |
Text String |
255 characters |
Required if Unique ID not present |
|
Unique ID |
Text String |
100 characters |
Required if Email not present |
Usually the ID from your CRM or SIS system |
Type |
Text String |
255 characters |
Yes |
Must match member type exactly |
*Please take note of which fields are marked as required.
*For more information on member types, click here.
Additional columns beyond the five standard fields will be included in your import template if you have added custom fields to your site. These fields are not required to pre-verify a member. The below contains information regarding certain types of custom fields. Please note that if your import file is blank for that particular custom field and row, the import will still process and will not fail.
Field Type
|
Requirements
|
Date Field |
YYYY-MM-DD(e.g. 2016-06-01) |
Multiple Choice |
Must match available options exactly |
True/False |
Accepts t/f;true/false;1/0;y/n;yes/no |
Address |
Import template will automatically create columns for street, street 2, city, state, and country |
Web Link |
Must be in a URL format (e.g. http://getwisr.com ) |
SFTP Automation or Admin Data Job Processing
The below instructions are for Wisr site admins that choose to process the three core Data Jobs themselves. Choosing to automate via SFTP exchange with Wisr is also an option for each data job. If you are interested in pursuing the SFTP option, please follow the instructions here to set up a Wisr-hosted SFTP.
Running The Pre-Verification Upload
Now that you have completed your import template, it is time to run the file upload. Click either on:
- Members > view the Pre-Verified tab > click the dropdown next to ‘Add one’ > click Pre-verify new members
- Data Tools > click the dropdown next to ‘New Job’ > Pre-verify new members
This will bring you to the screen that prompts you to choose a file. Choose your desired file and press Next. You will now be prompted to map columns from the file to Wisr fields. Please select the proper option or skip if you wish to not import that column from your file. Once this is done, press next and you will be shown the previously selected fields and columns for confirmation. After confirming that you have chosen the right options, you are ready to start the process. Proceed to the next screen and you will see the status of the pre-verified data job. It will initially have an incomplete status. Refreshing the screen will show the updated status as well as any new verifications, updated verifications, skipped records, errors and warnings at the bottom. For common warnings and errors, please see the section at the bottom of this article.


The status bar will update as the job completes and when the job completes the status will read as "Completed."

Formatting Education Data
In order to successfully import education data, you will need to provide the following information below. A degree import template can be retrieved by going to Members > view the Pre-Verified tab > click the dropdown next to ‘Add one’ > click Upload degree data > download a sample .csv.
Field
|
Required
|
Note
|
Unique ID |
Yes |
Must match the Unique ID of an existing verification to import |
Degree |
Yes |
BA, Bachelor of Arts, MBA, Master of Business Administration |
Graduation Year |
Yes |
Must be in YYYY format |
Major |
No |
Optional, but recommended |
Subschool |
No |
Must match values set during implementation for colleges, departments |
Bulk Updating Active and Pre-Verified Members
Wisr supports updating existing data within the application based on either a Unique ID or a Profile ID. Please note that if a Profile ID is chosen as the identifier to update records, you will only be updating Active members. Updating information by Unique ID is the preferred method. The file will need to be in the following format:
- File Headers - Unique ID or Profile ID (required), followed by the columns you want to update
The process to run the Update Members data job is very similar to the pre-verification data job. Go into the Data Tools section of your admin tools, and click on New Job and select Update Members. Choose your CSV file and click next, where you will now map columns and choose your unique identifier to update records. Please ensure that your unique identifier matches the identifier in your CSV file. You are now ready to start your data job.
After pressing start, refresh the screen until the job is complete. The job log at the bottom will show you the total number of profiles and pre-verified verifications updated as well as give you warnings for any Unique ID’s that were skipped due to the ID not being found in our system. It will also give you a total skipped number.


The status bar will update as the job completes and when the job completes the status will read as "Completed."

Bulk Deactivating Active and Pre-Verified Members
The Data Tools within Wisr support the bulk deactivation of active profiles and the deletion of pre-verified records. The process is similar to the previous two data jobs. By utilizing a Unique ID instead of a Profile ID like above, Wisr Admins can bulk deactivate/delete both active and pre-verified records in the same job. The file will need to conform to the following format:
- File Headers - Unique ID or Profile ID (required), followed by a deactivation reason column which is optional.
After composing your file, head into the Data Tools section of the Wisr admin panel, click New Job and select Deactivate members. Choose your CSV file from your local drive, and press next when ready. The next screen will require you to choose your columns and keys. When ready, press next and you are now ready to run your data job.
Refresh the screen until the job is complete. The job log at the bottom of the page contains the number of Profiles deactivated (which indicates an Active Member) as well as includes the number of Verifications deleted (which indicates a pre-verified record that never became active). Any Unique ID’s not found in our system that were included in your file will be included in the messages at the bottom as well as a skipped total.


The status bar will update as the job completes and when the job completes the status will read as "Completed."

Common Warning and Error Messages
Pre-verified Data Job
profile already exists warning - information was skipped due to that member being active. If this active record needs to be updated, please run the Update Members Data Job.
Update Members Data Job
No record exists for Unique ID/Profile ID – this means there was an ID in your CSV file that was not in our system and the ID was skipped
More than one user found for 000xx8392 (Sample Unique ID) – The record was skipped as a precaution. Please contact a Wisr admin if you wish to update these records.
Event Management - Bulk Create and Update Events & Event Visibility by Member Type
The following columns are required for the file import:
a.Creating New Events: Assign a generic ID number, starting at 1, for each new event.
b.Updating Events: Locate the pre-existing Wisr Event ID (in the Wisr Admin Panel, in the Events section) and associate the existing Wisr Event ID to the appropriate updates,
a.Example: MM/DD/YYYY, HH:MM
a.Example: MM/DD/YYYY, HH:MM

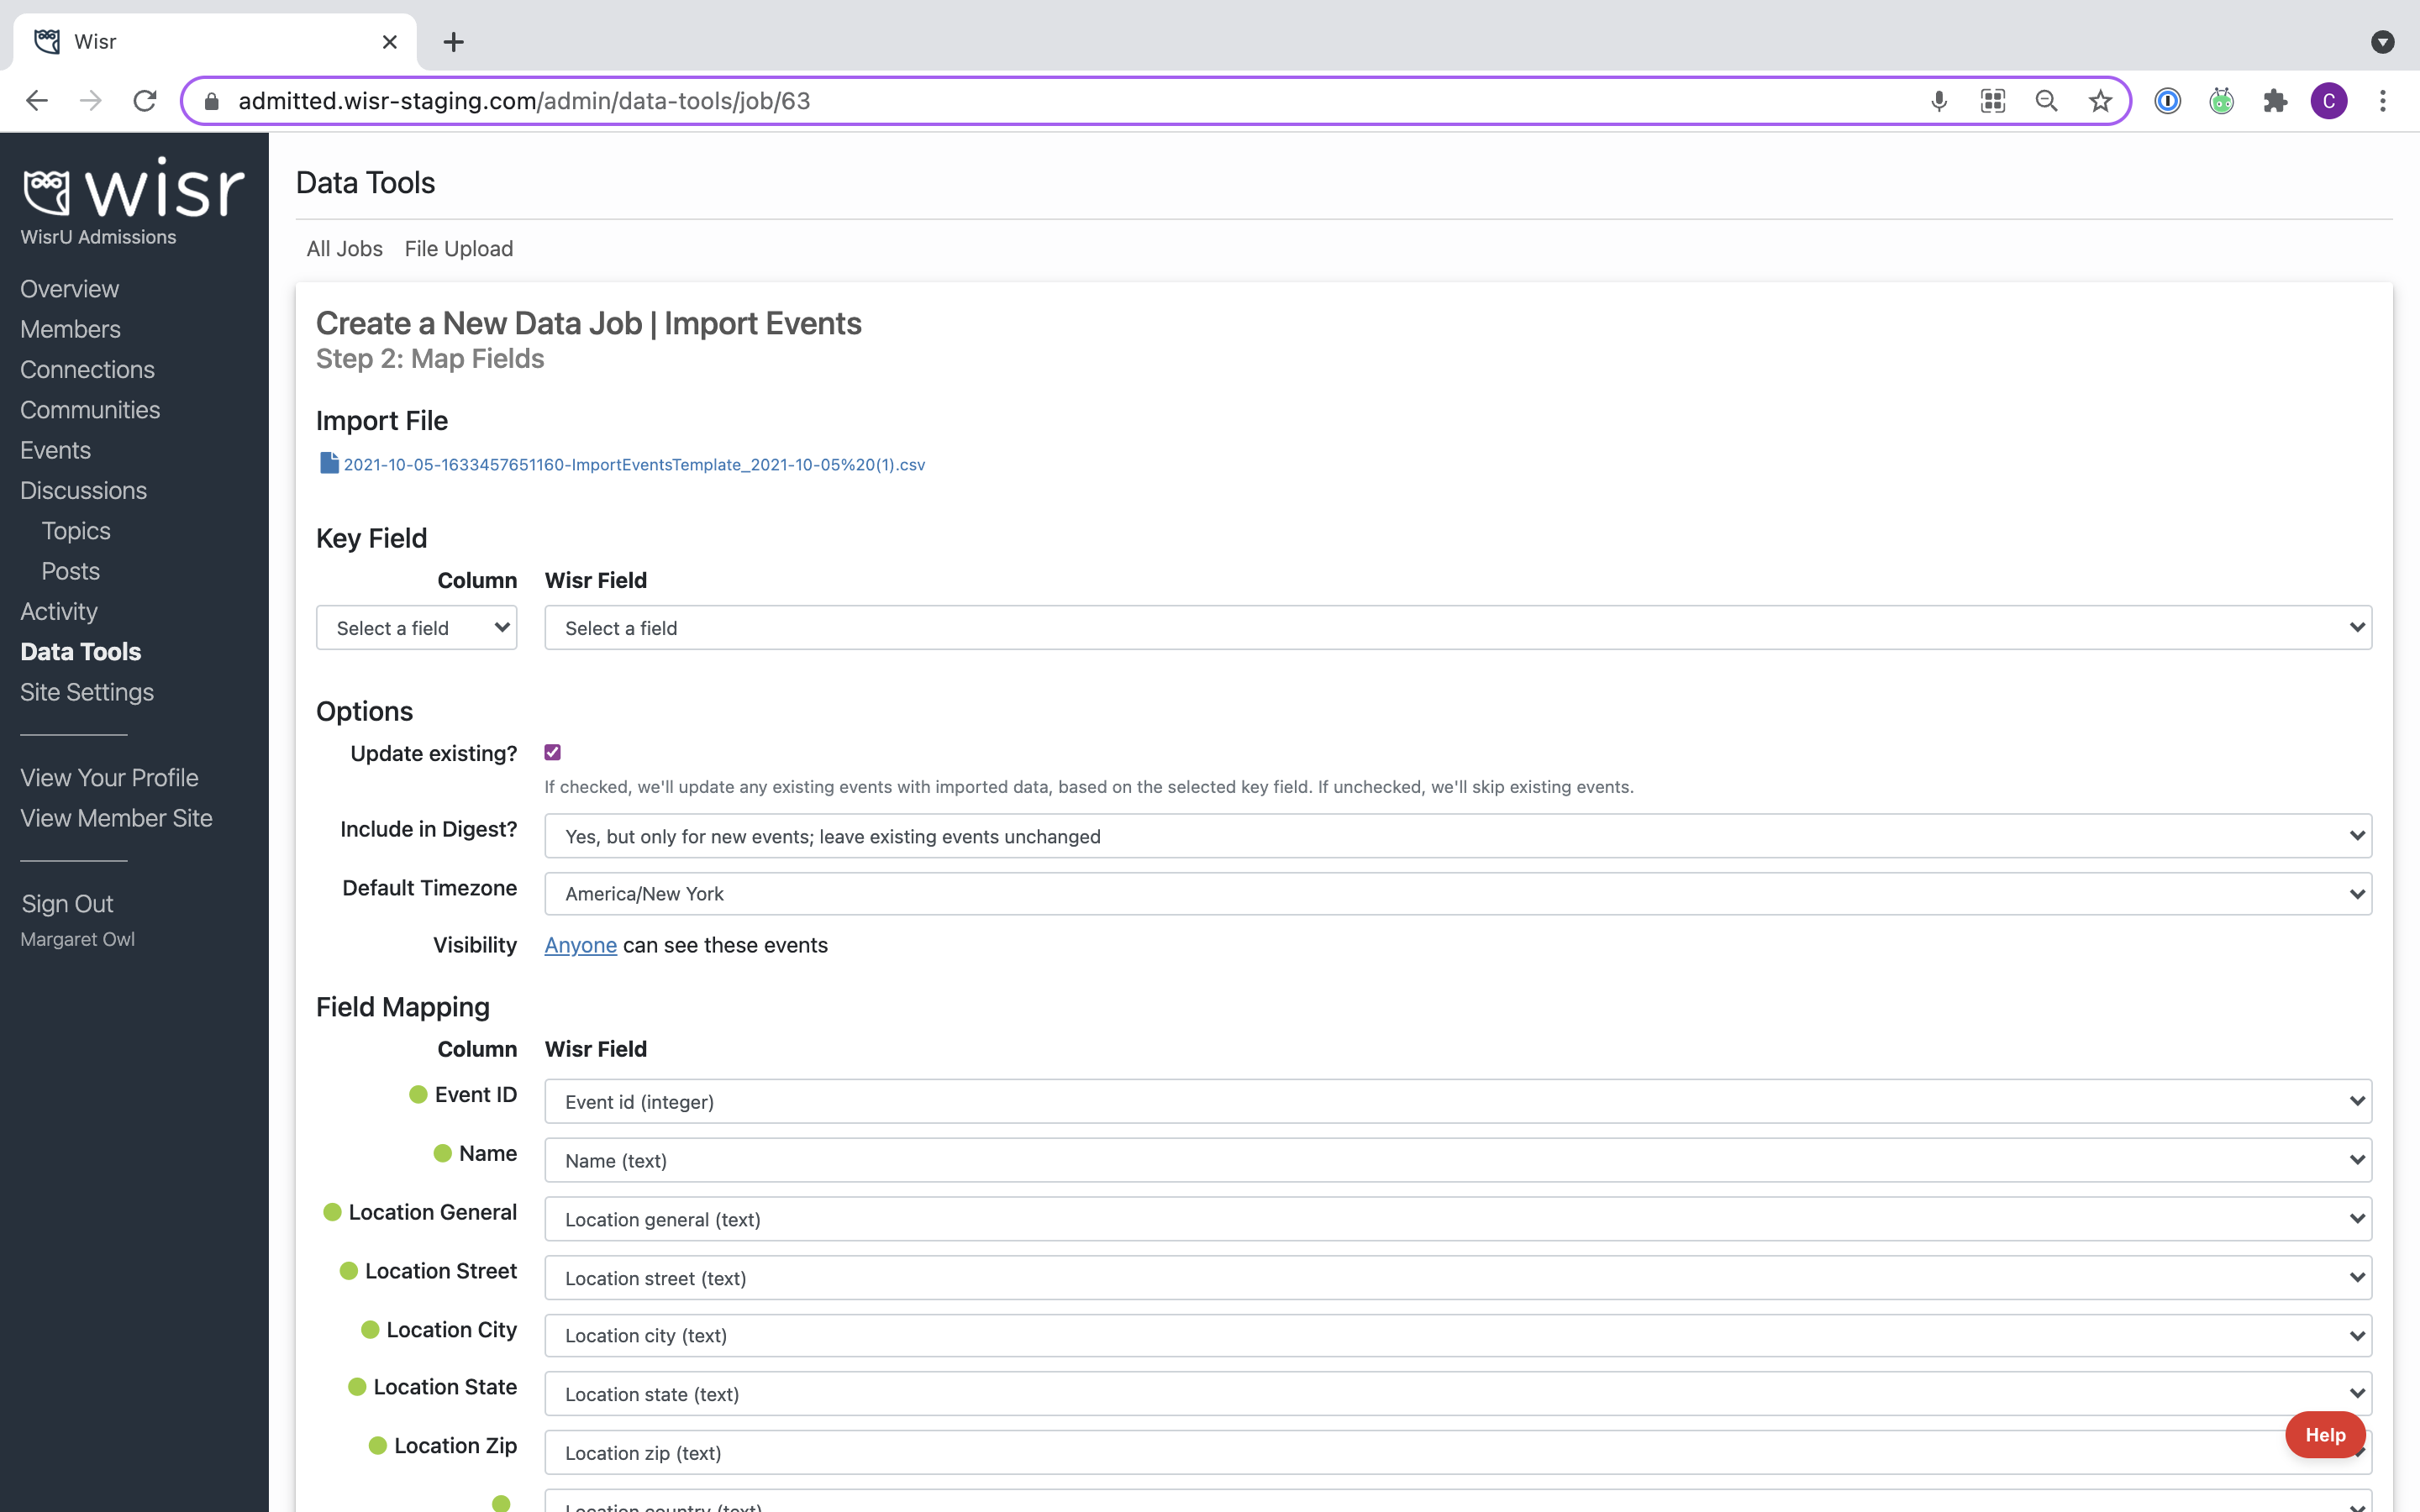
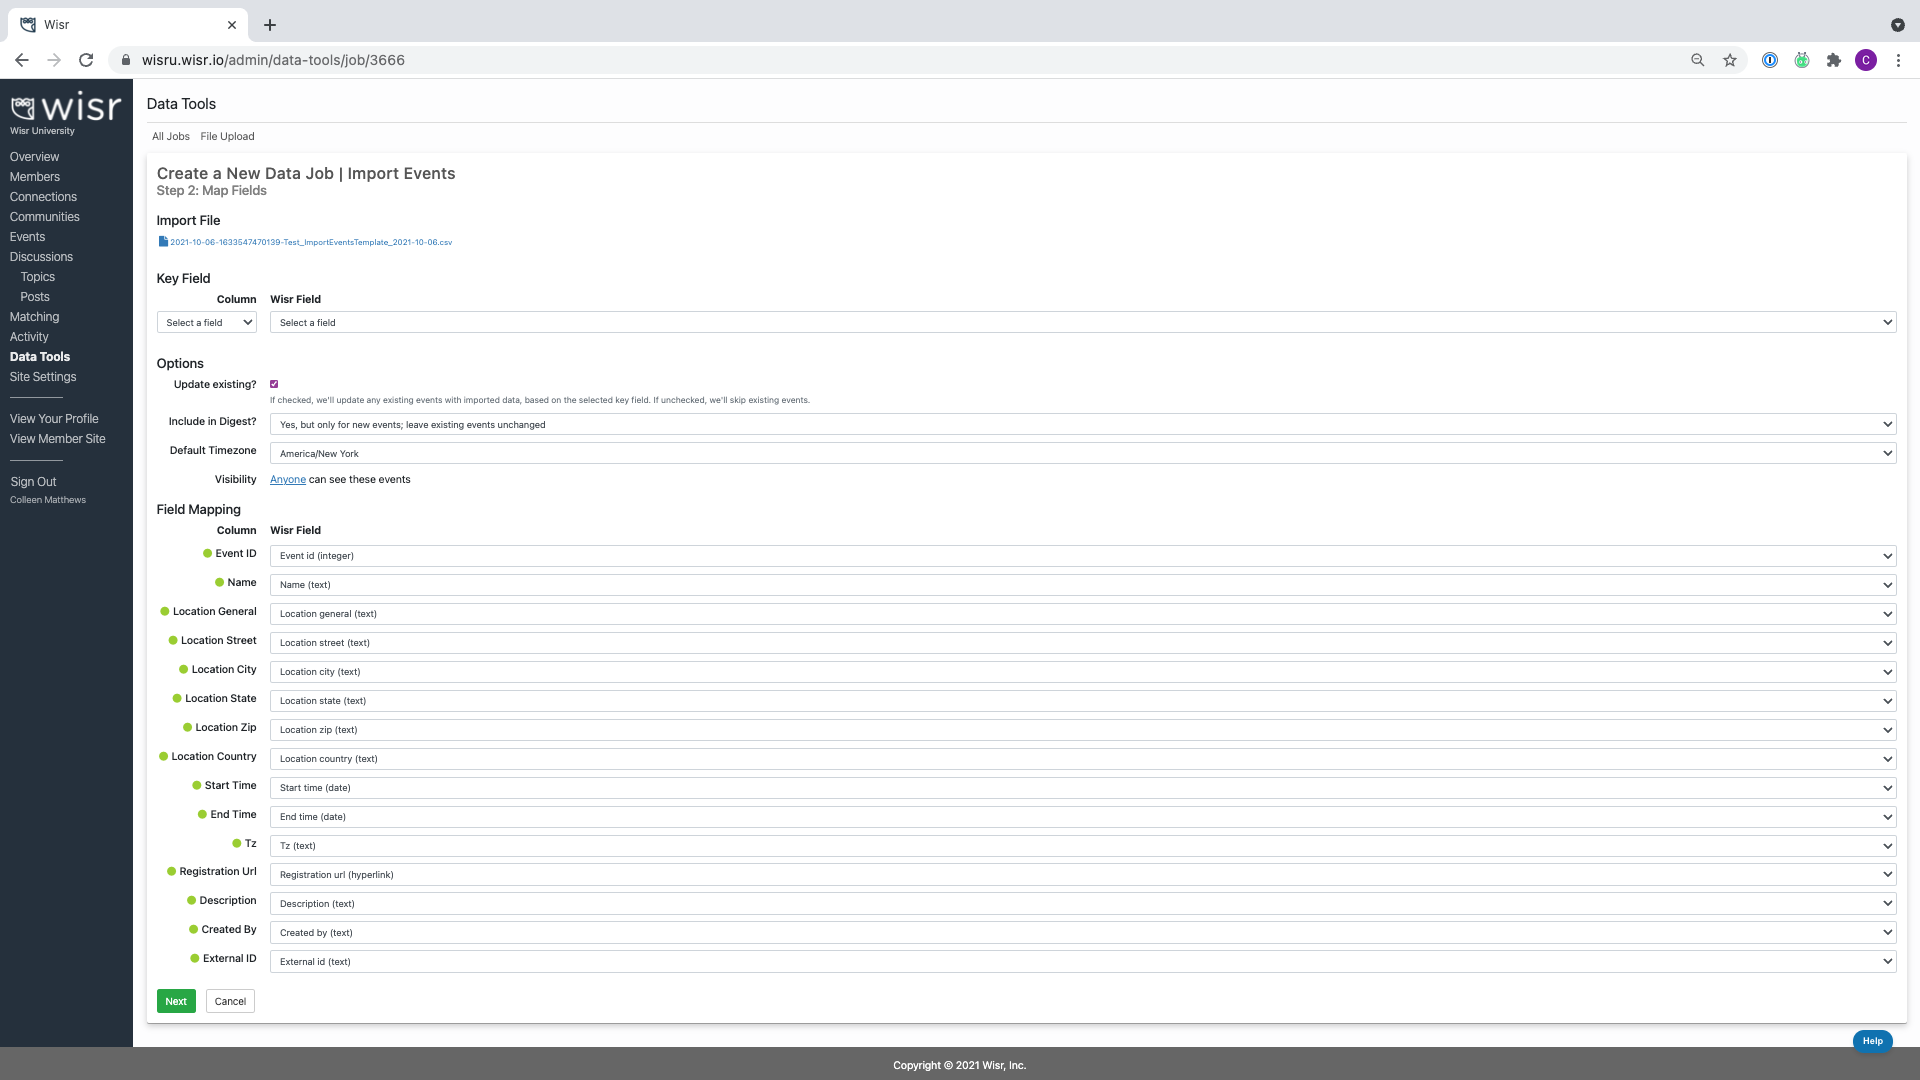
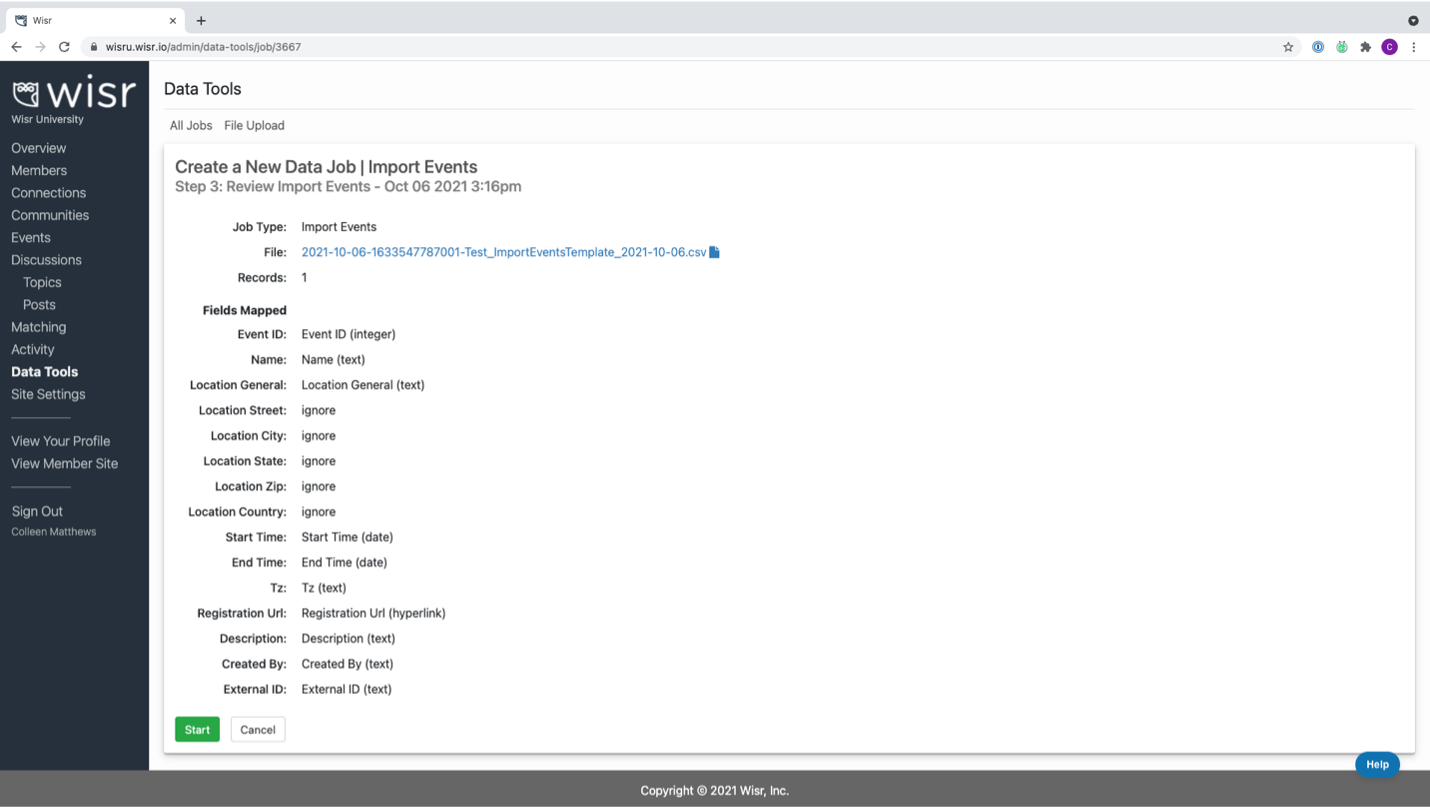
Creating New Events: When creating new events and updating pre-existing events, the Key Field should be set to Event ID in both the Column and Wisr Field drop downs.
Udate Existing:
Default Time zone: Adjust the event time zone if necessary.
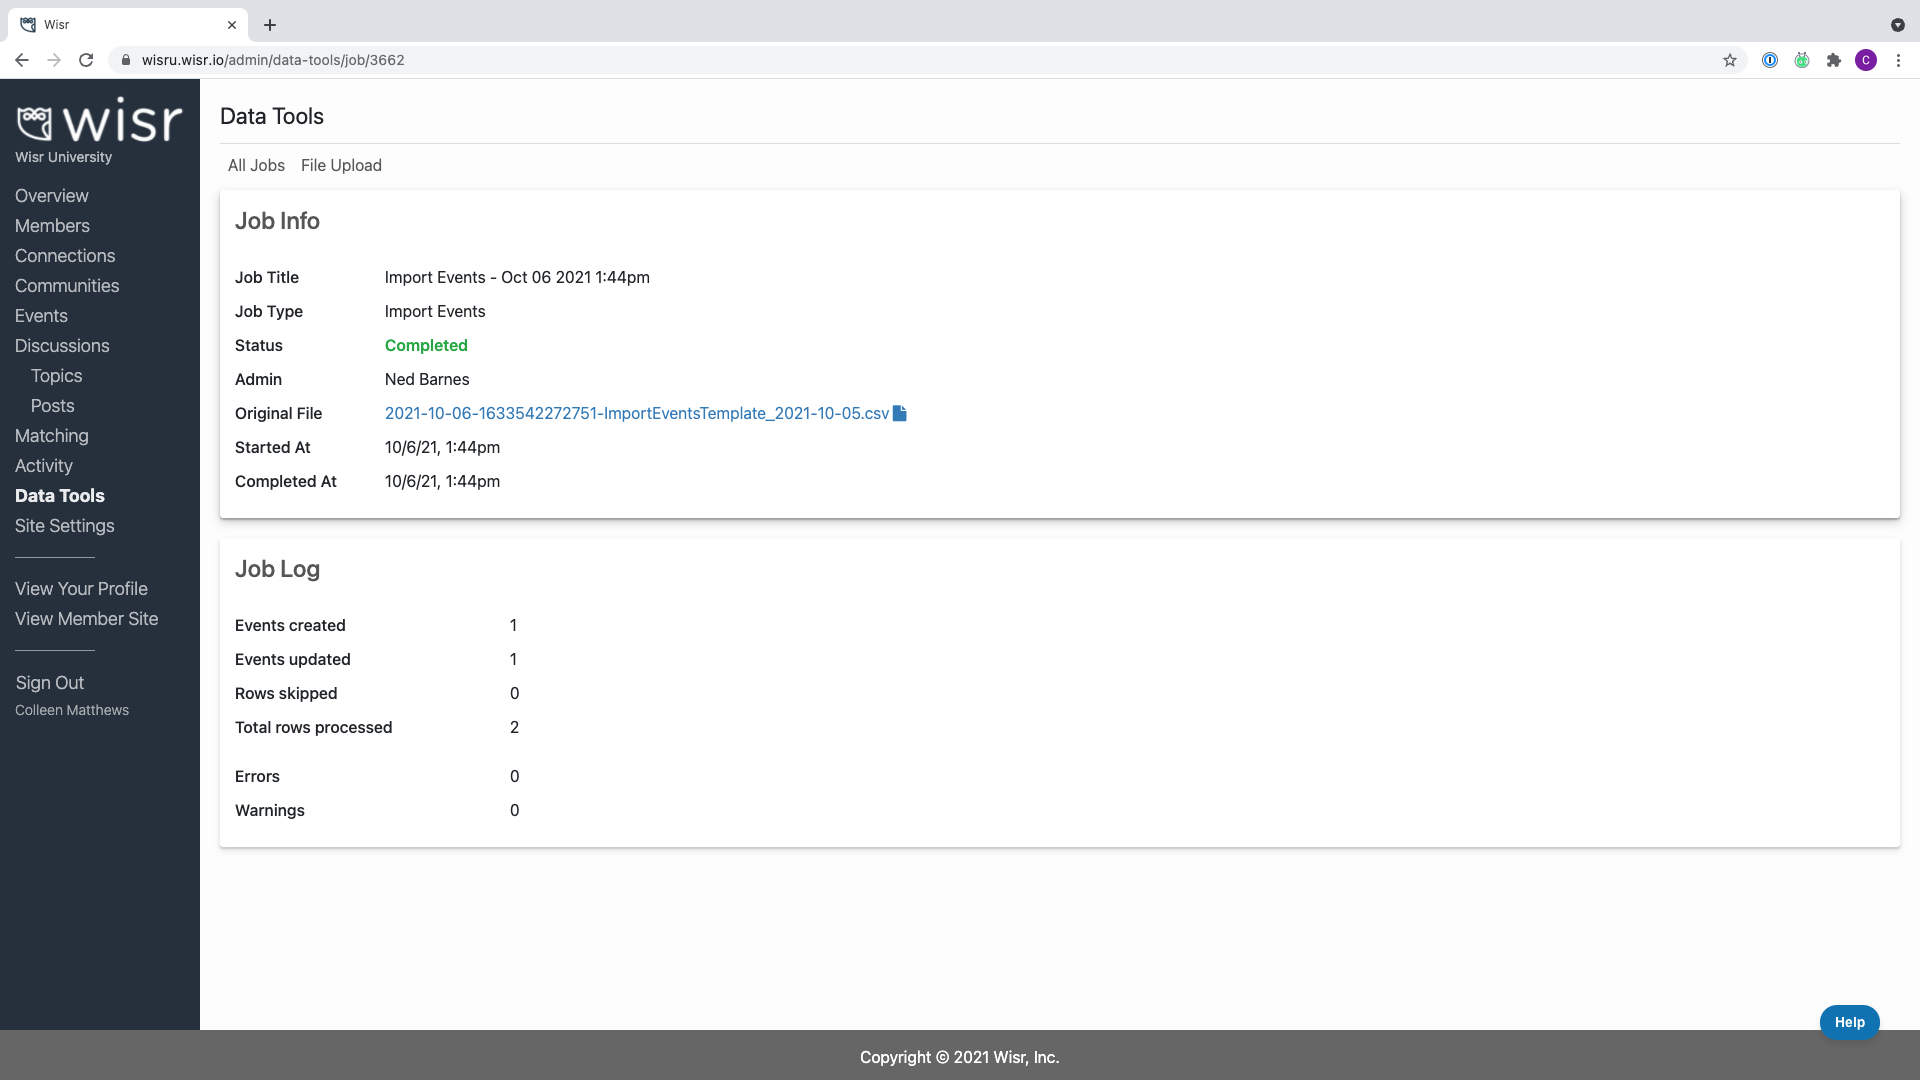
 Step 4: Data Job Information and Status: